Quickstart Guide
Jump to navigation
Jump to search
The purpose of this quickstart guide is to give researchers a basic tour of Pure and show them the quickest way to input their publication data and update their personal information.
First-time login and setup
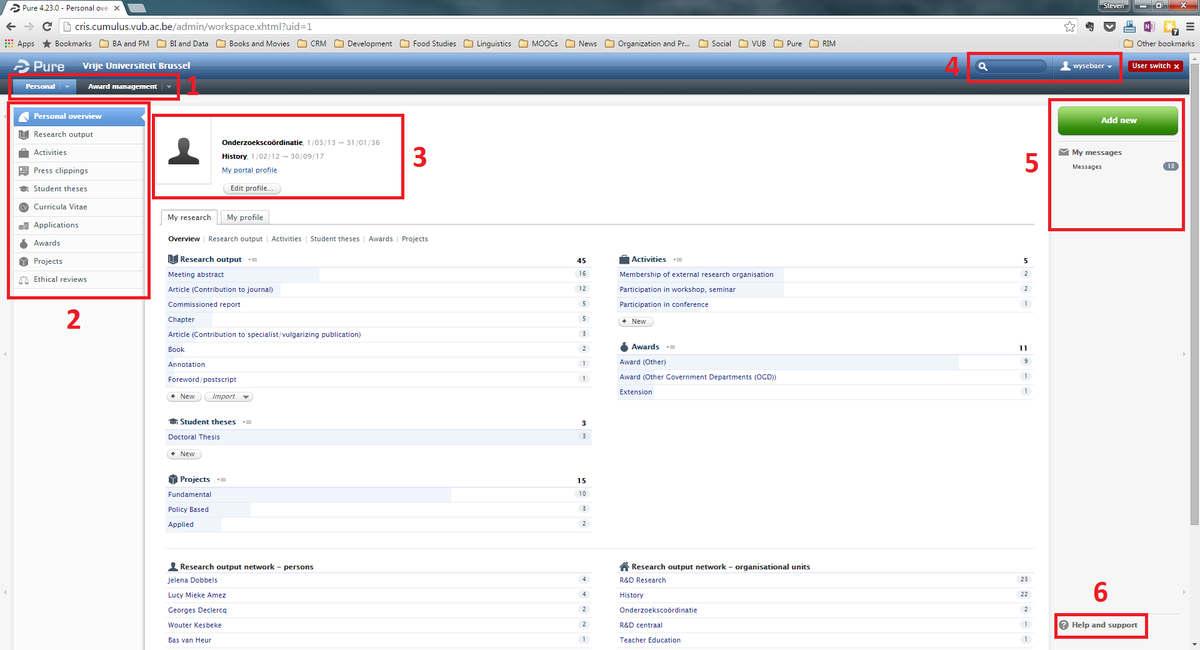
Authorized users can login through the login page. After logging in, a researcher without special permissions, should see a screen that looks like this:
The center of the interface is the working area, and changes depending on the type of content selected. The marked parts of the interface are:
- Modules: these are the modules to which the user has access. Researchers will work most, if not all, of the time in Personal. Users with additional permissions may have other tabs here, such as Editor, Master Data and Administrator.
- Objects: these contain the actual content entered by the researcher and grants read-access to other researchers' content in Pure. When hovering the cursor over these objects, a plus sign may appear. Clicking this plus sign allows researchers to add new content of that type.
- Personal information: this displays your active affiliations, personal details you have entered and a picture if you have added one to your profile. Adding this information is possible by clicking the Edit profile ... button.
- Search bar and user options: the search bar allows users to look through all their personal content, wildcards (such as * or ?) are generally not necessary. Clicking the user option button opens a pop-up window where some user settings can be modified.
- Communication panel: this panel contains links to messages sent by the systems or administrators, or tasks to be completed, if any (in the example, no tasks are waiting). Additionally, the big green Add new-button allows users to create new activities, research outputs or other editable objects.
- Help & support: here you find links to this wiki, to a number of screencasts and to the helpdesk's email.
